


Do a simple experiment in the home assistant
Updated on Jan 12th, 2025: IAMMETER is constantly evolving, providing more ways to integrate with Home Assistant. The simplest method is through MQTT discovery in Home Assistant. For details, please refer to the article: Enable MQTT Discovery in Home Assistant with the Latest IAMMETER Firmware (i.76.058.8).
Additionally, please check out this article for a comparison of integration options: Five Options to Integrate IAMMETER’s Energy Meter into Home Assistant (Core Integration, HACS, MQTT, Modbus/TCP, MQTT Discovery).
Control the Sonoff relays in real-time according to the power value of the energy meter
Abstract: this experiment illustrates how to request the power value of the Wi-Fi energy meter (IAMMETER) from the modbus tcp sensor(Home assistant) in 1s/s (sample/second) and use this reading as the feedback value to control the SONOFF relay operate in real-time.
Request the data of energy meter in Home Assistant(Modbus/TCP) in 1s/s(sample/second) and trigger the Sonoff in real-time.
welcome to discuss this topic here
The video tutorial of this document
Home Assistant Setting
Configuration the IAMMETER`s energy meter in Home Assistant
Single phase energy meter WEM3080: [modbusTCP in Home Assistant](https://github.com/lewei50/Solar-PV-Monitoring/blob/master/Yaml in Home Assistant/ModbusTCP/modbus1.yaml)
Three phase energy meter WEM3080T: [modbusTCP in Home Assistant](https://github.com/lewei50/Solar-PV-Monitoring/blob/master/Yaml in Home Assistant/ModbusTCP/modbus.yaml)
To use this sensor in your installation, add the following to your
configuration.yamlfile(for example WEM3080):Please remember to add 'scan_interval: 1' after ' name: Modbus_Power' to make home assistant to refresh the power reading every 1 second.
# Example configuration.yaml entry for multiple TCP connections
modbus:
  - name: hub11
    type: tcp
    host: 192.168.1.6
    port: 502
    sensors:
      - name: Modbus_Voltage
        slave: 1
        address: 0
        input_type: holding
        unit_of_measurement: V
        device_class: voltage
        state_class: measurement
        count: 1
        scale: 0.01
        offset: 0
        precision: 1
        data_type: uint16
      - name: Modbus_Current
        slave: 1
        address: 1
        input_type: holding
        unit_of_measurement: A
        device_class: current
        state_class: measurement
        count: 1
        scale: 0.01
        offset: 0
        precision: 1
        data_type: uint16
      - name: Modbus_Power
        slave: 1
        address: 2
        input_type: holding
        unit_of_measurement: W
        device_class: power
        state_class: measurement
        count: 2
        scale: 1
        offset: 0
        precision: 0
        data_type: int32
        scan_interval: 1
      - name: Modbus_ImportEnergy
        slave: 1
        address: 4
        input_type: holding
        unit_of_measurement: kWh
        device_class: energy
        state_class: total_increasing
        count: 2
        scale: 0.0003125
        offset: 0
        precision: 3
        data_type: uint32
      - name: Modbus_ExportGrid
        slave: 1
        address: 6
        input_type: holding
        unit_of_measurement: kWh
        device_class: energy
        state_class: total_increasing
        count: 2
        scale: 0.0003125
        offset: 0
        precision: 3
        data_type: uint32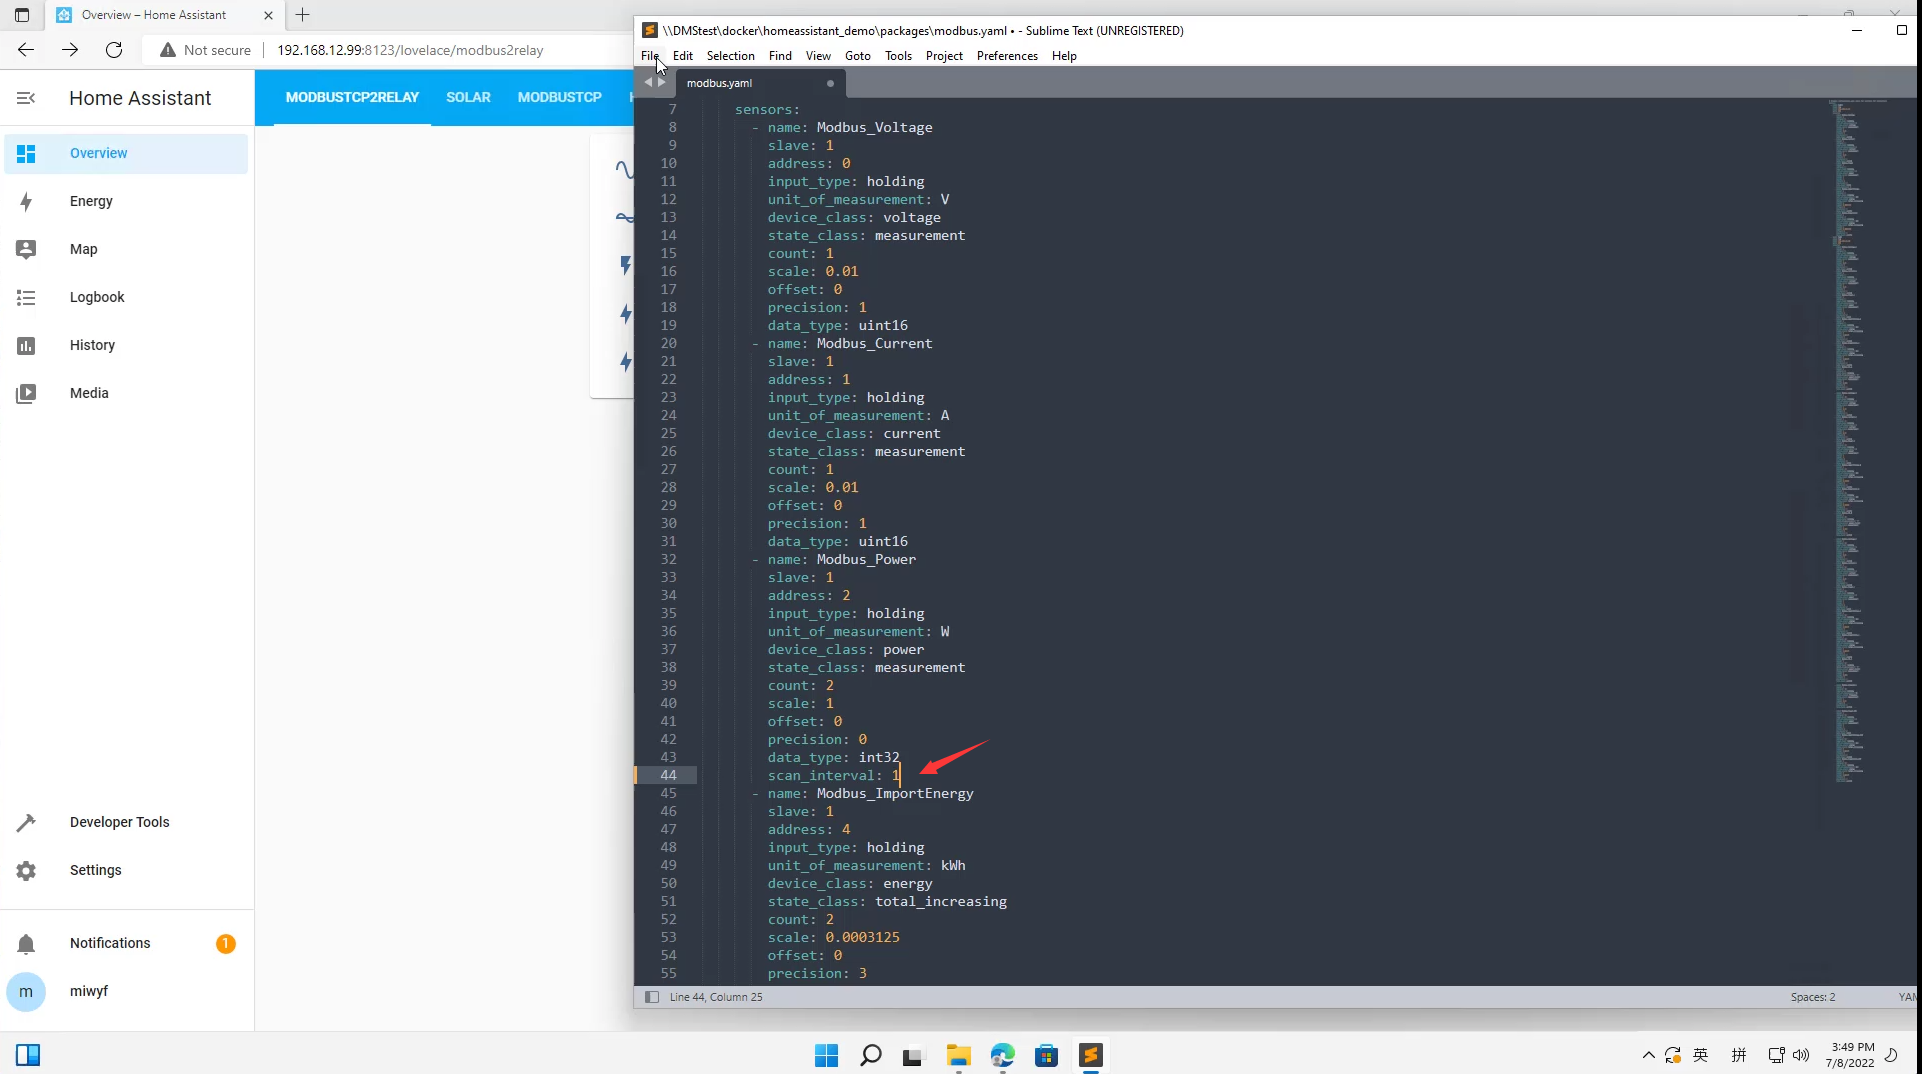
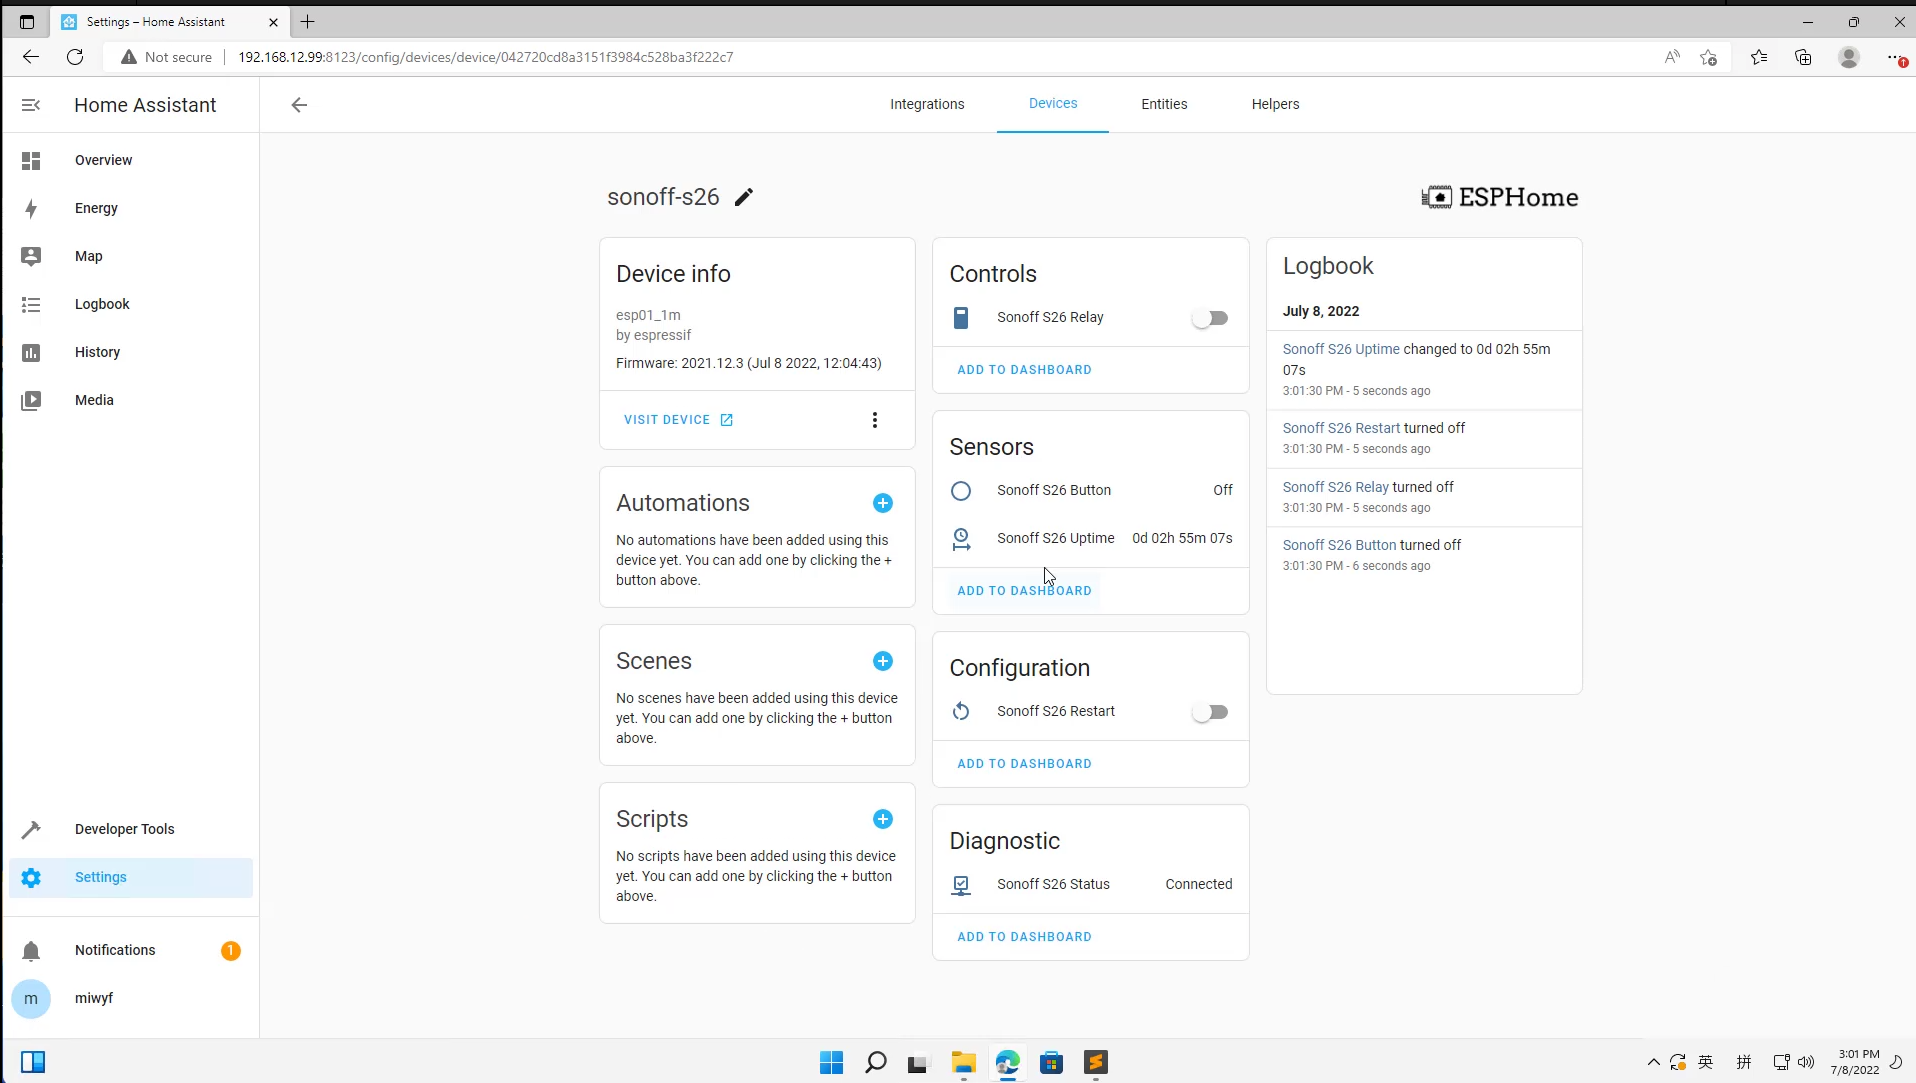
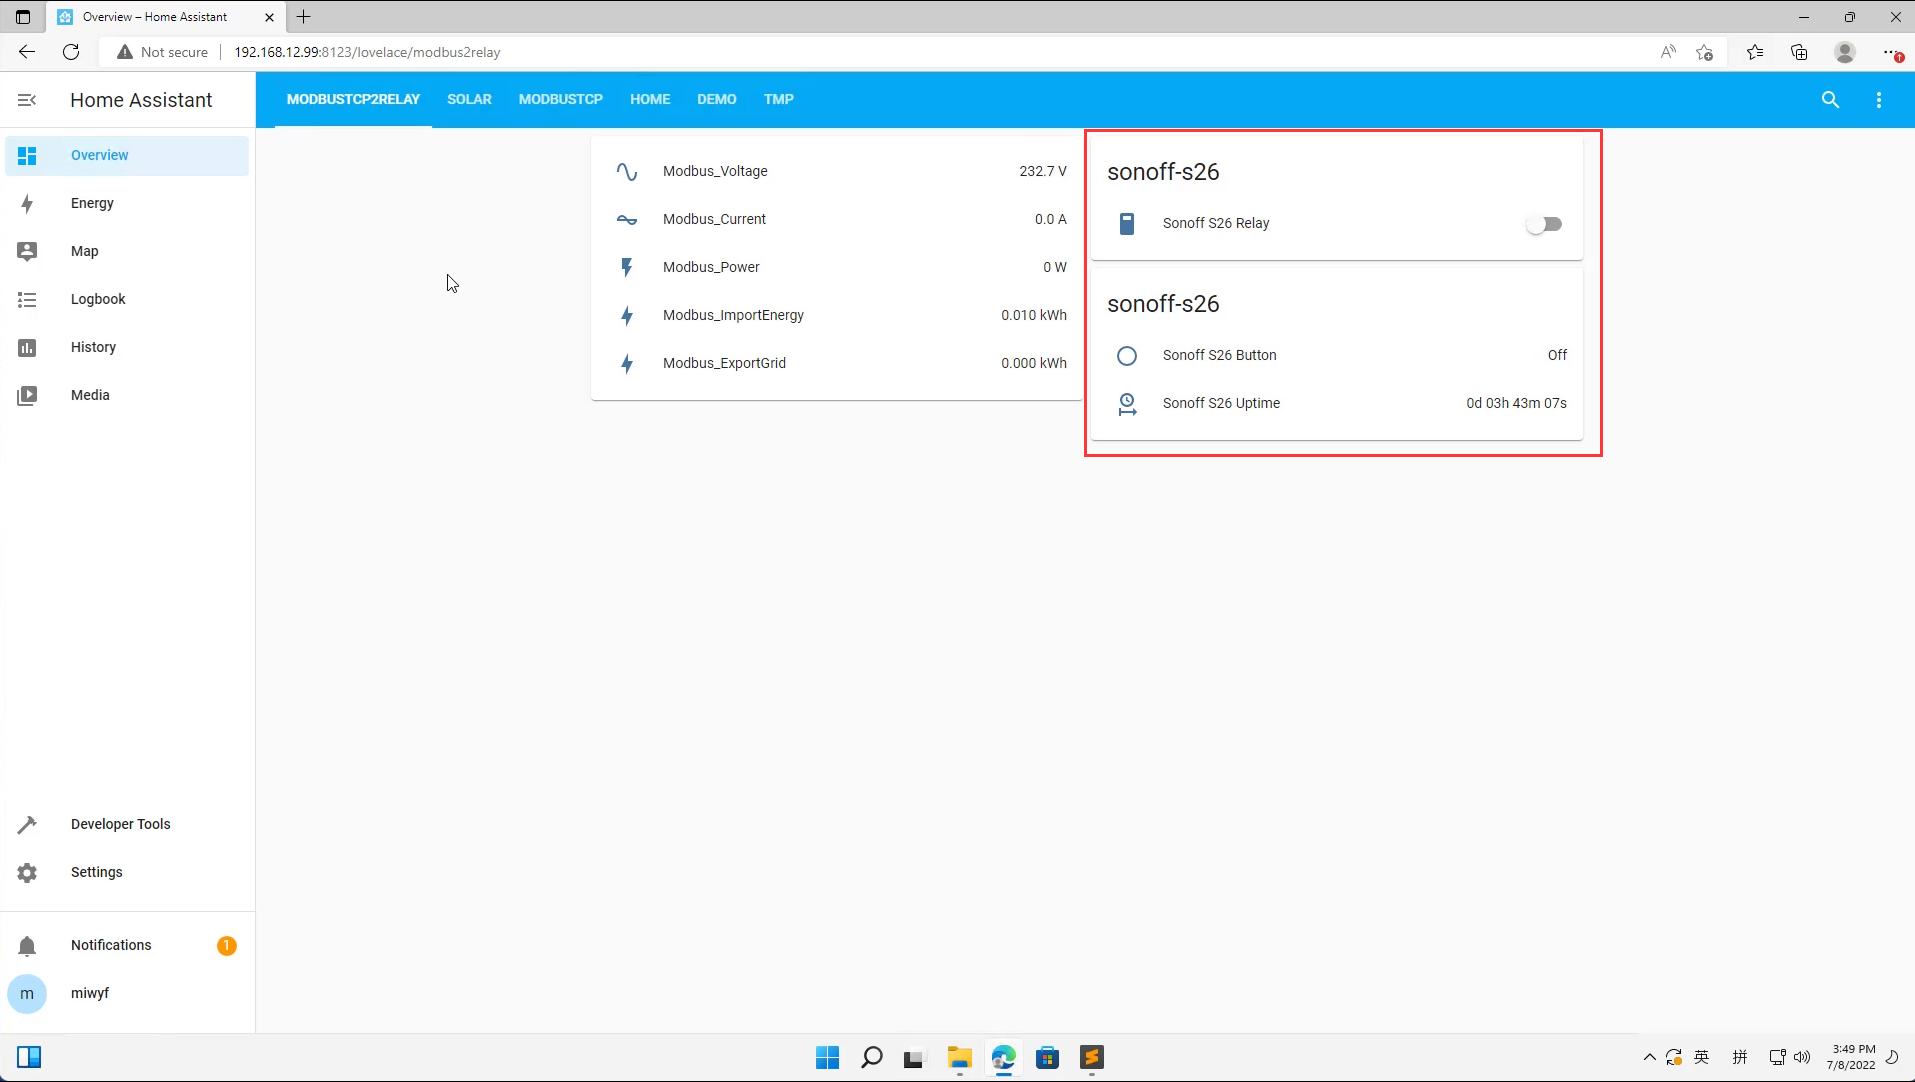
Add the opensource relay or the smart socket(Esphome, Tasmota,etc ...) that supported in Home Assistant. What we used in this experiment is the sonoff (S26 ).
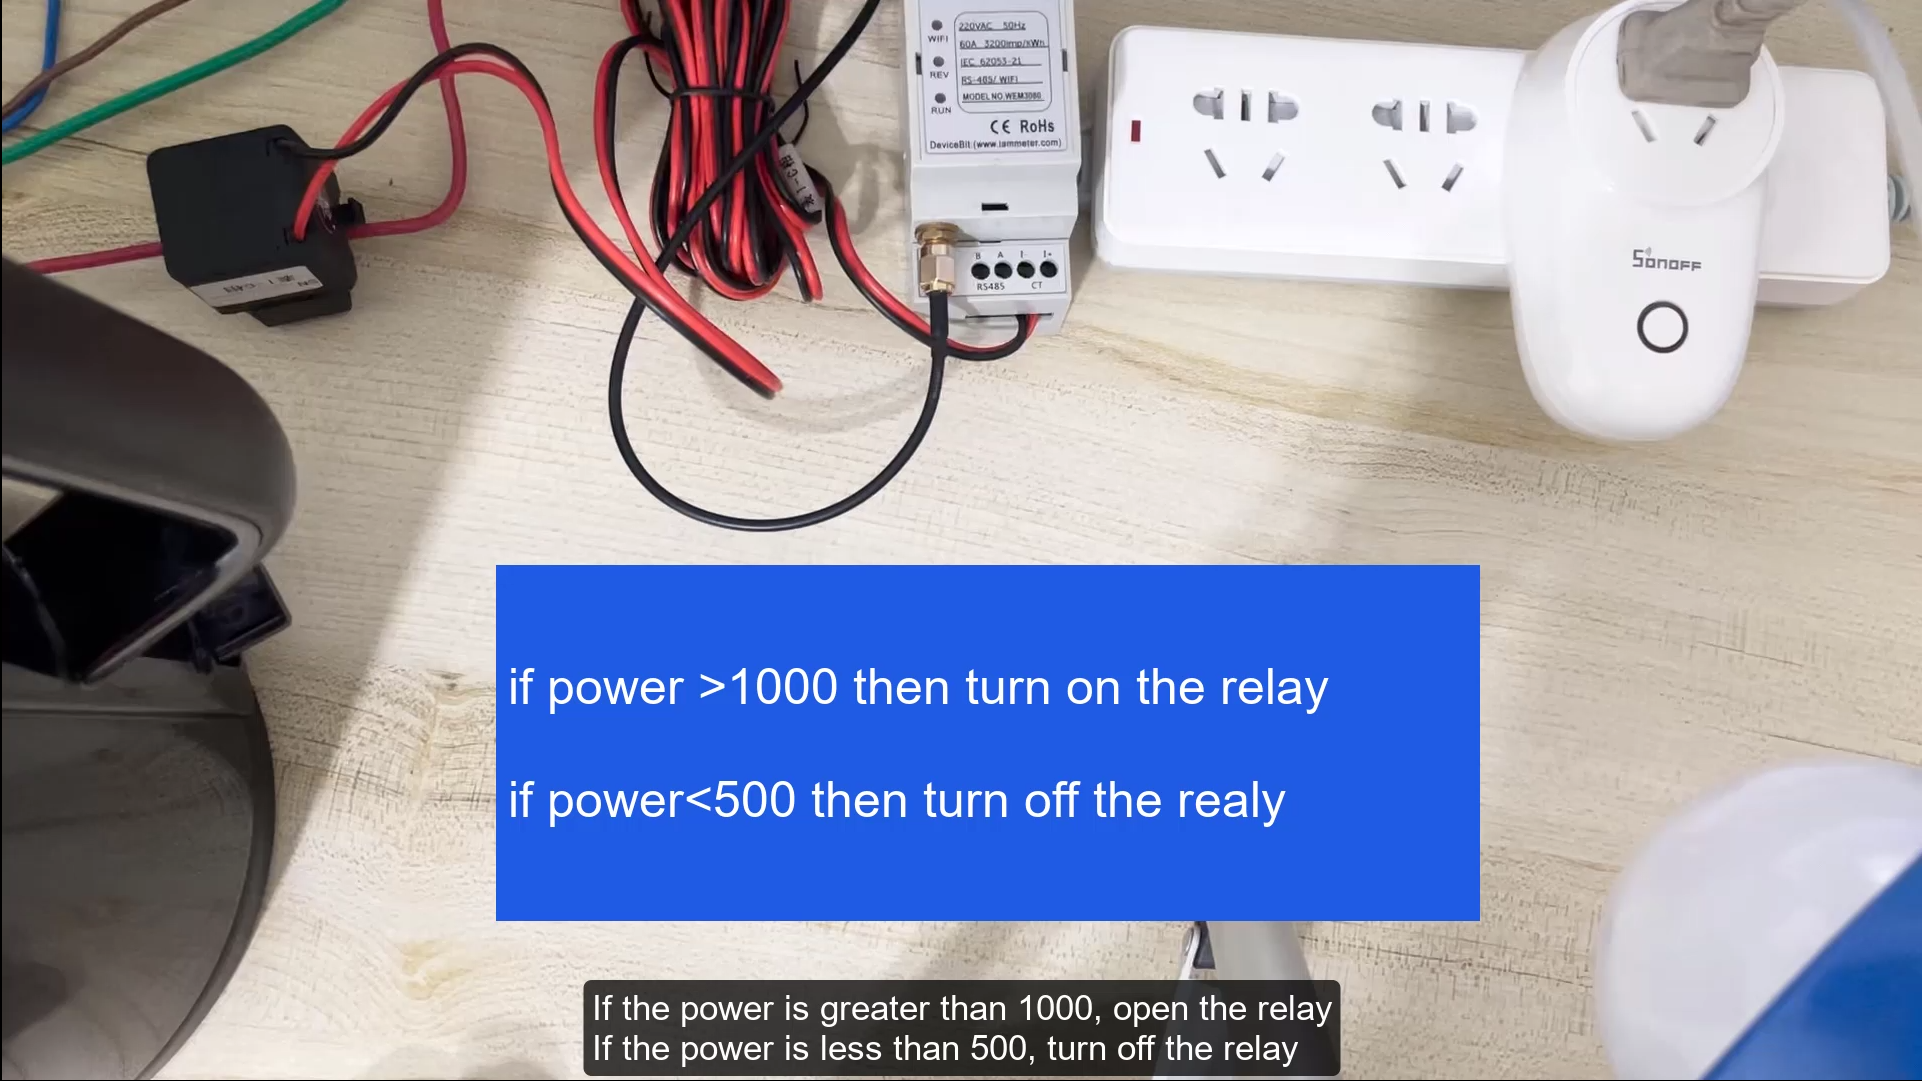
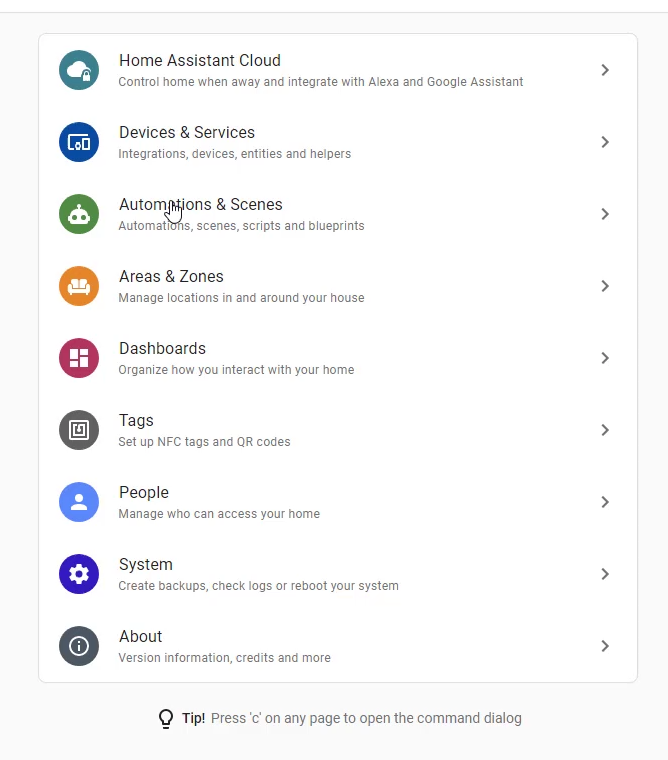
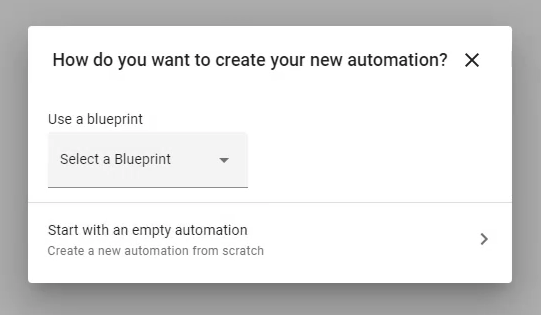
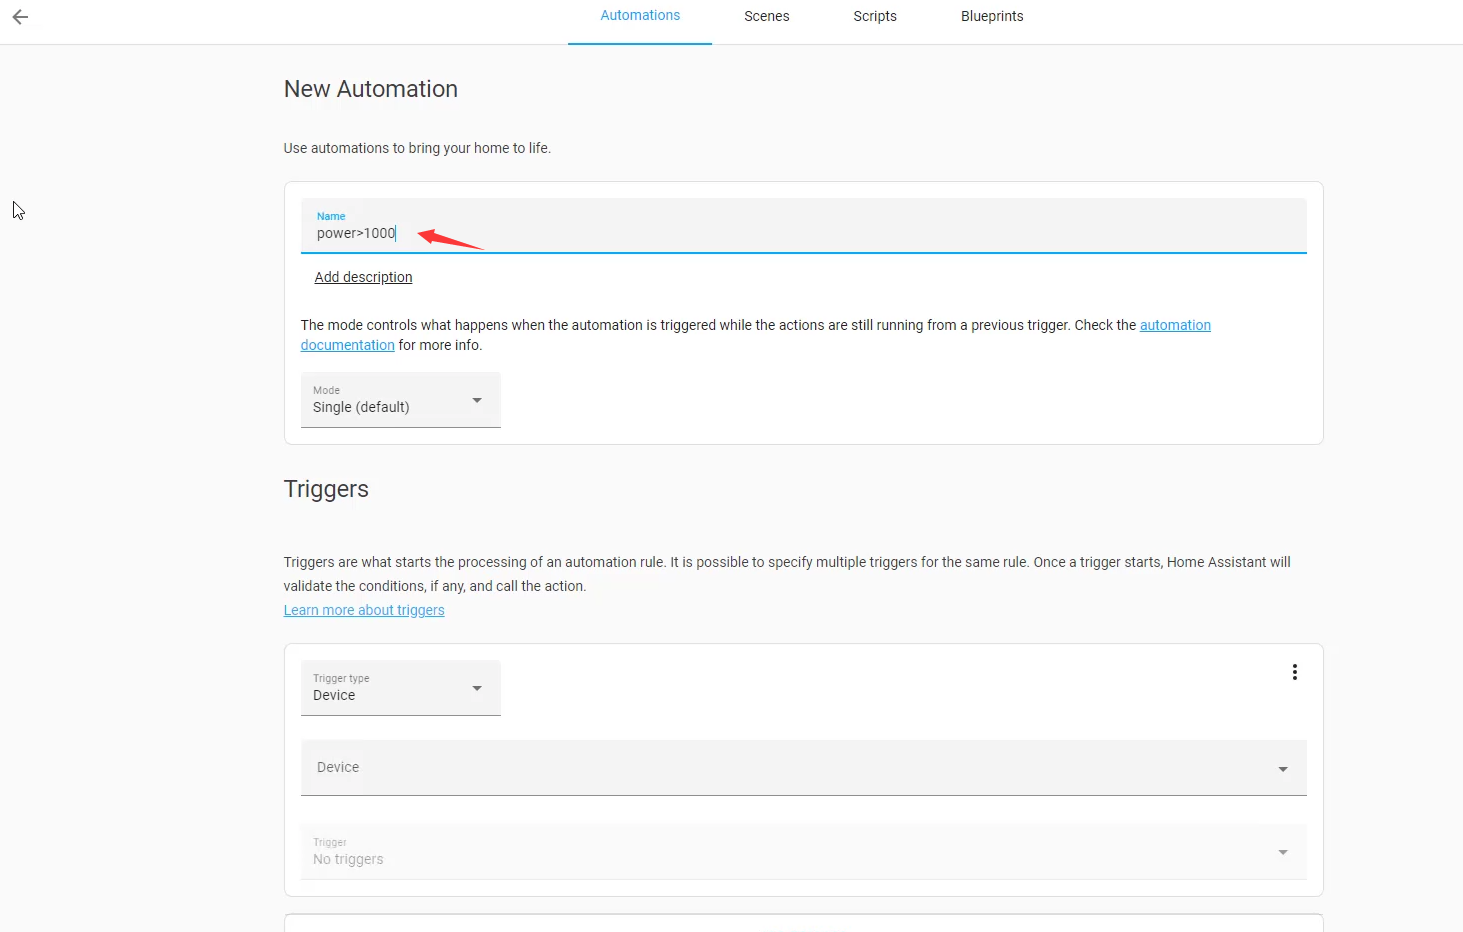
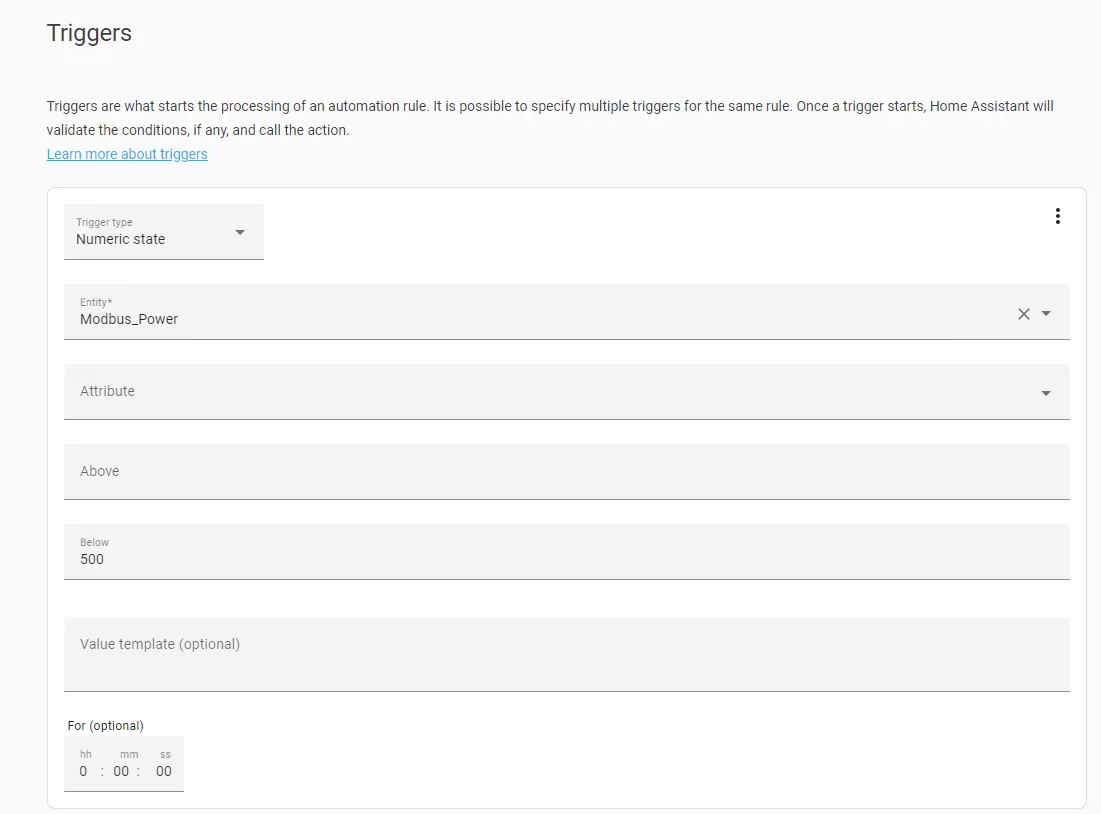
Add the Automations in Home Assistant:
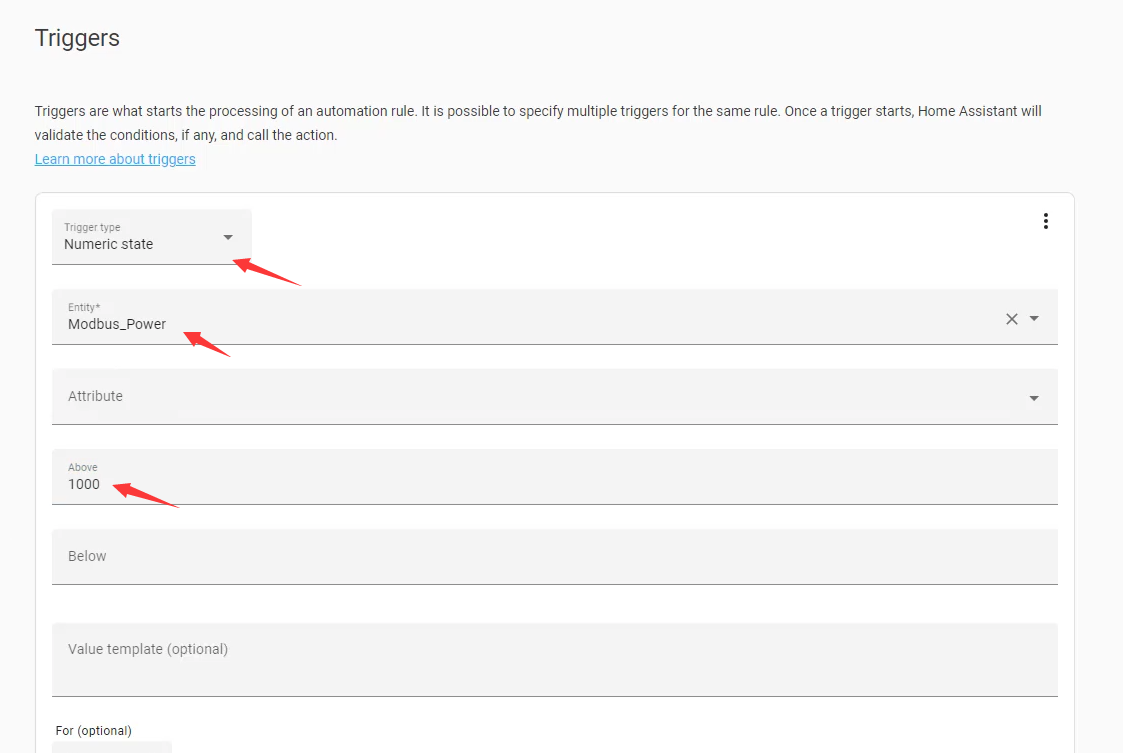
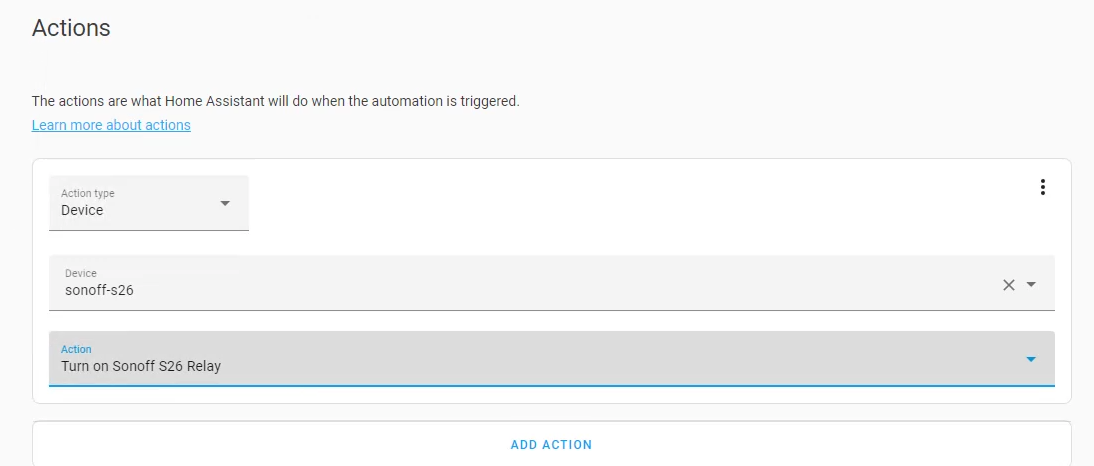
when the power is greater than 1000, turn on Sonoff S26:

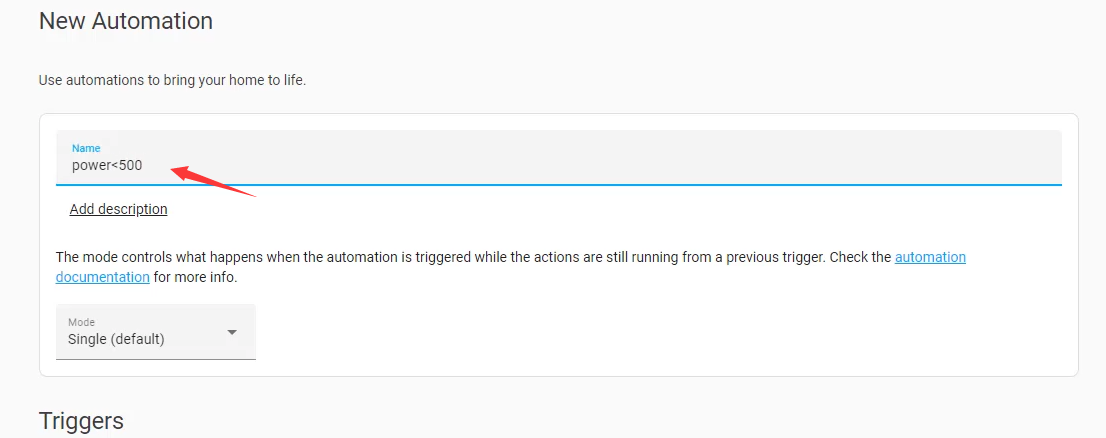
Power<500 then Turn off Sonoff S26:


The experiment effect
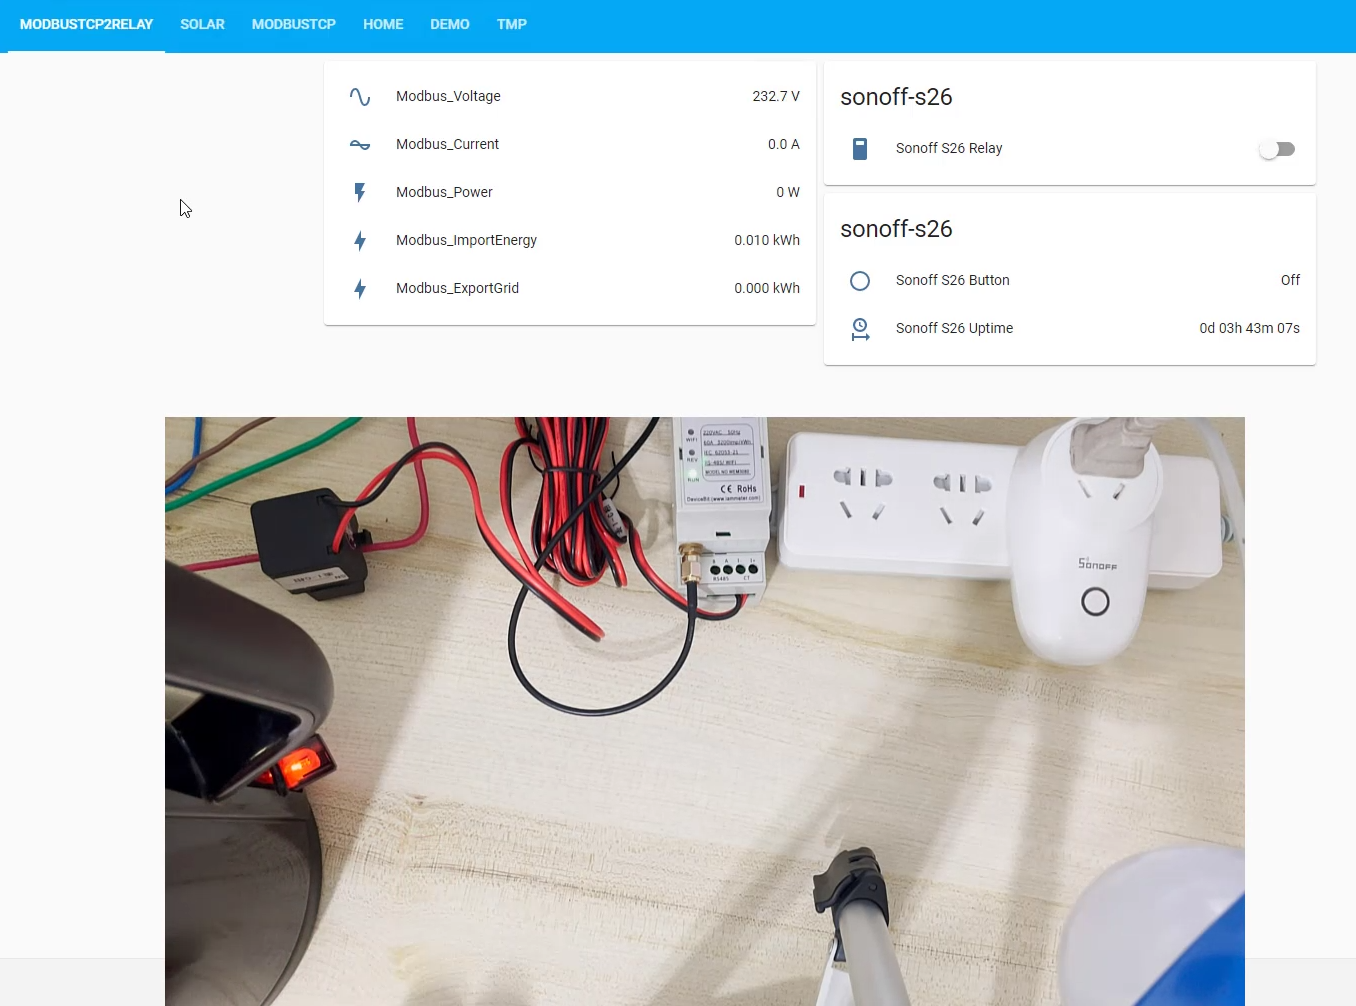
Use a Electric kettle to produce the load power.
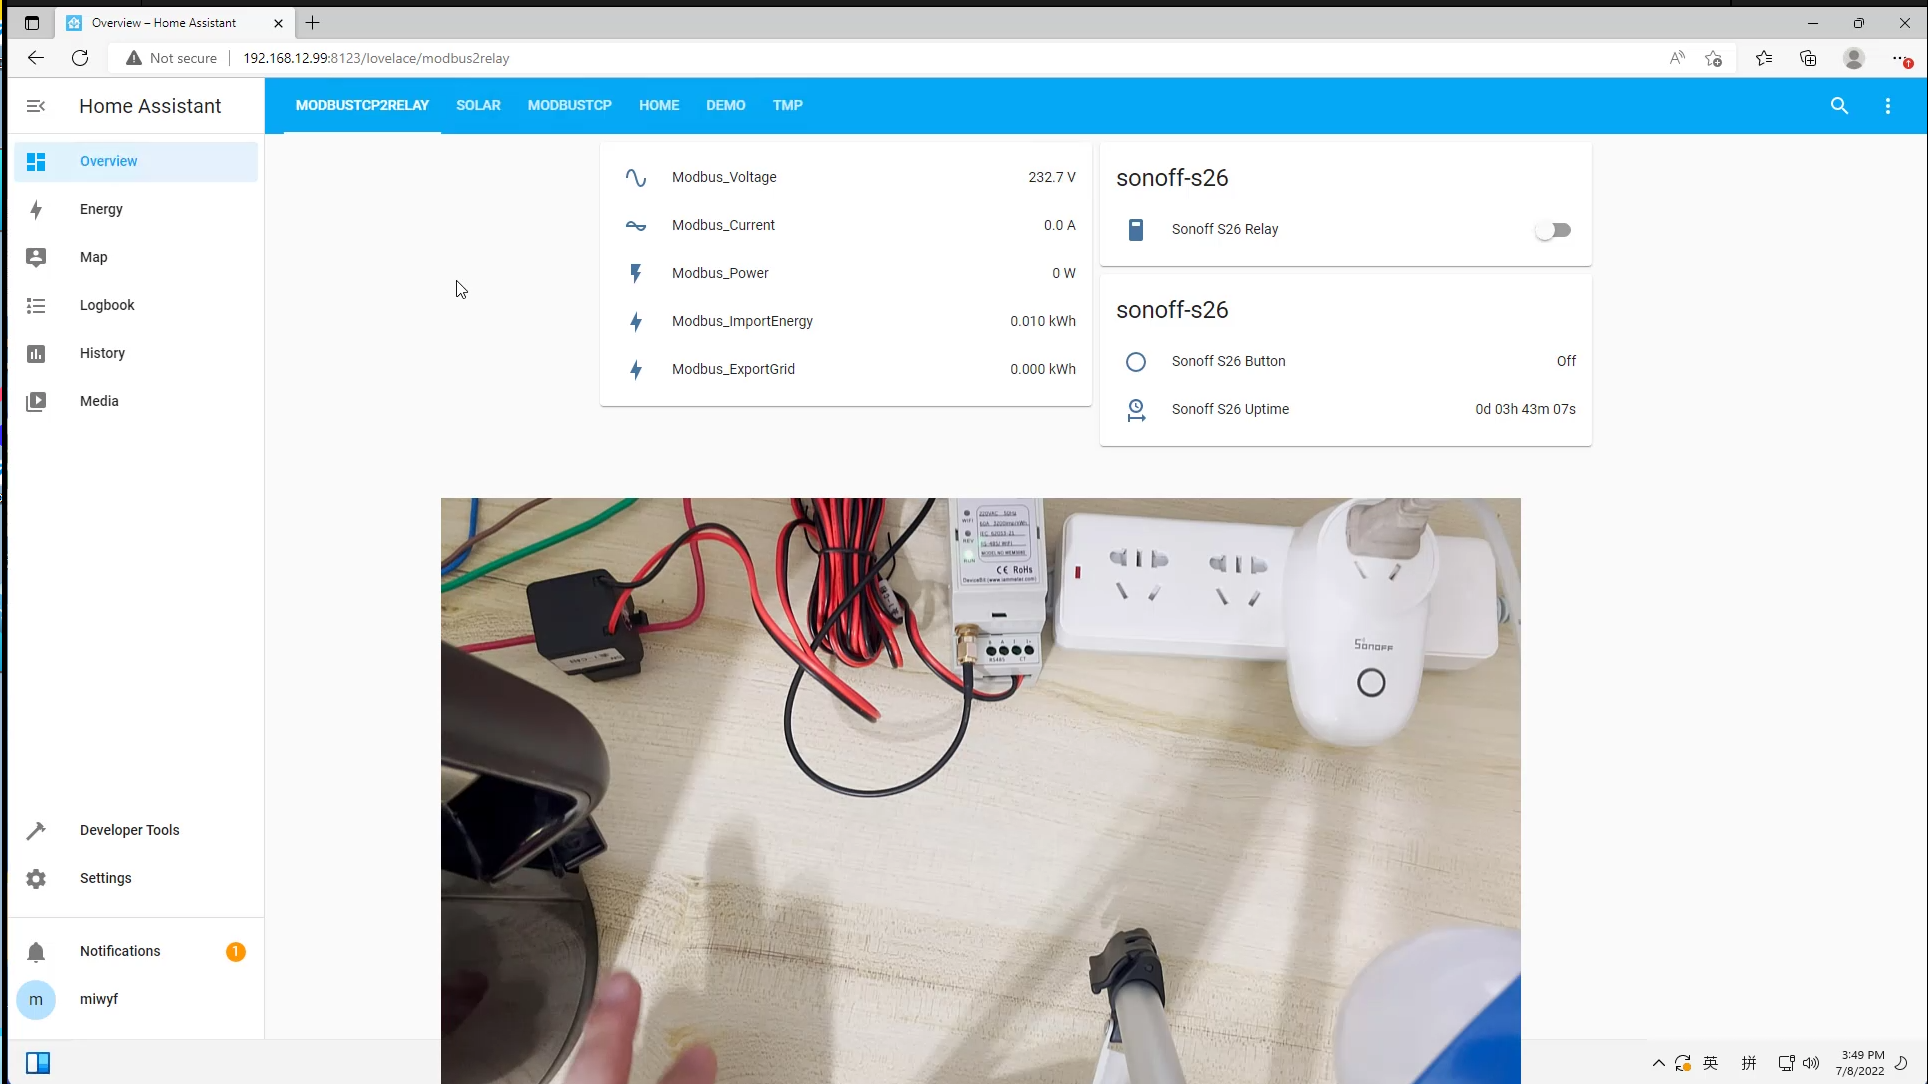
At beginning ,the electric kettle is off,the load power is 0w, the sonoff smart socket is also off.
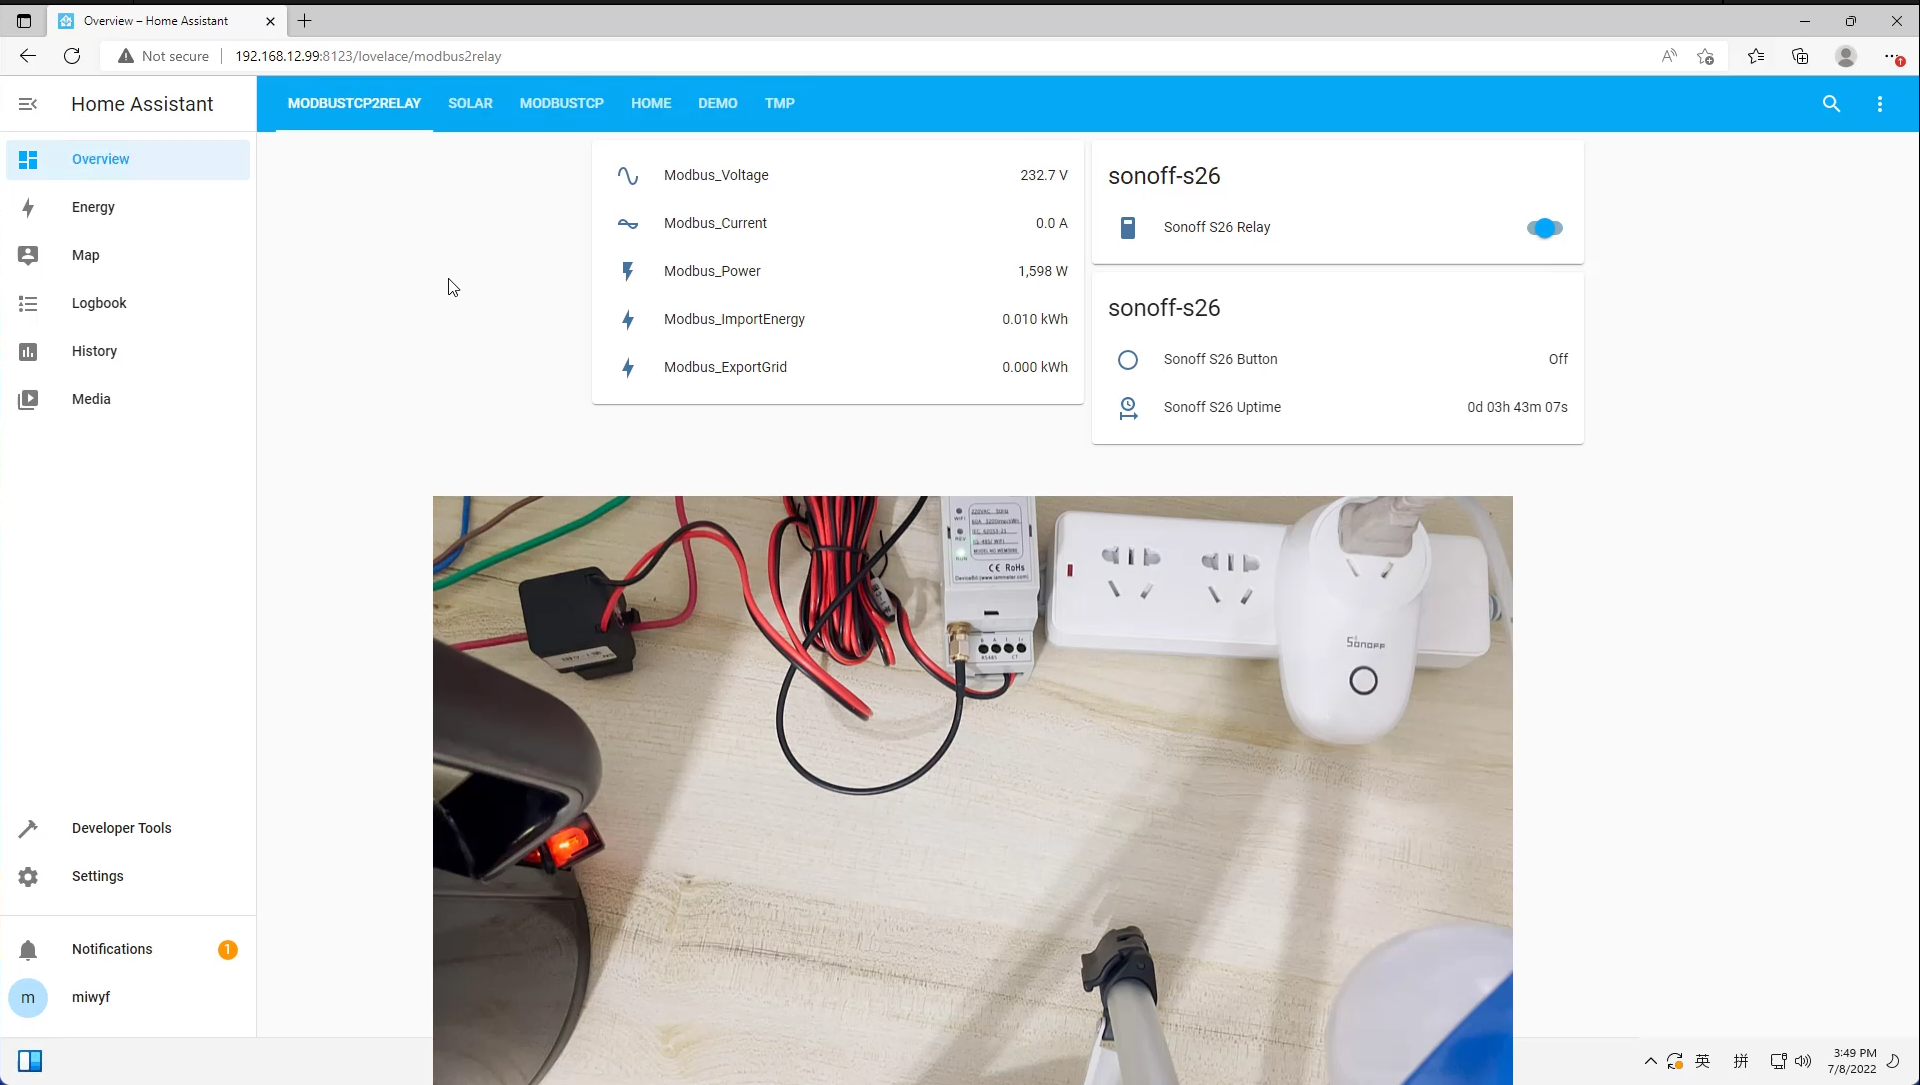
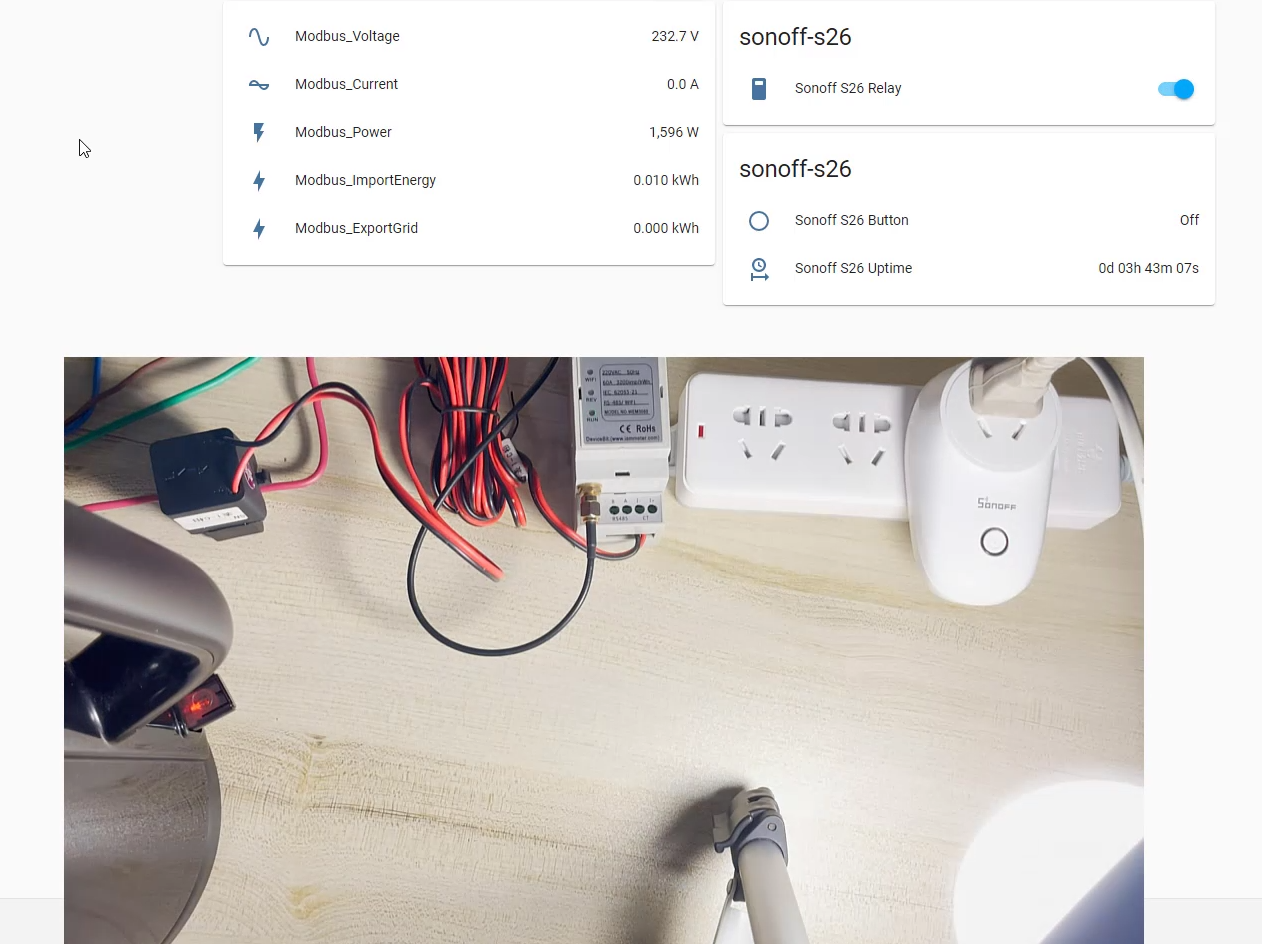
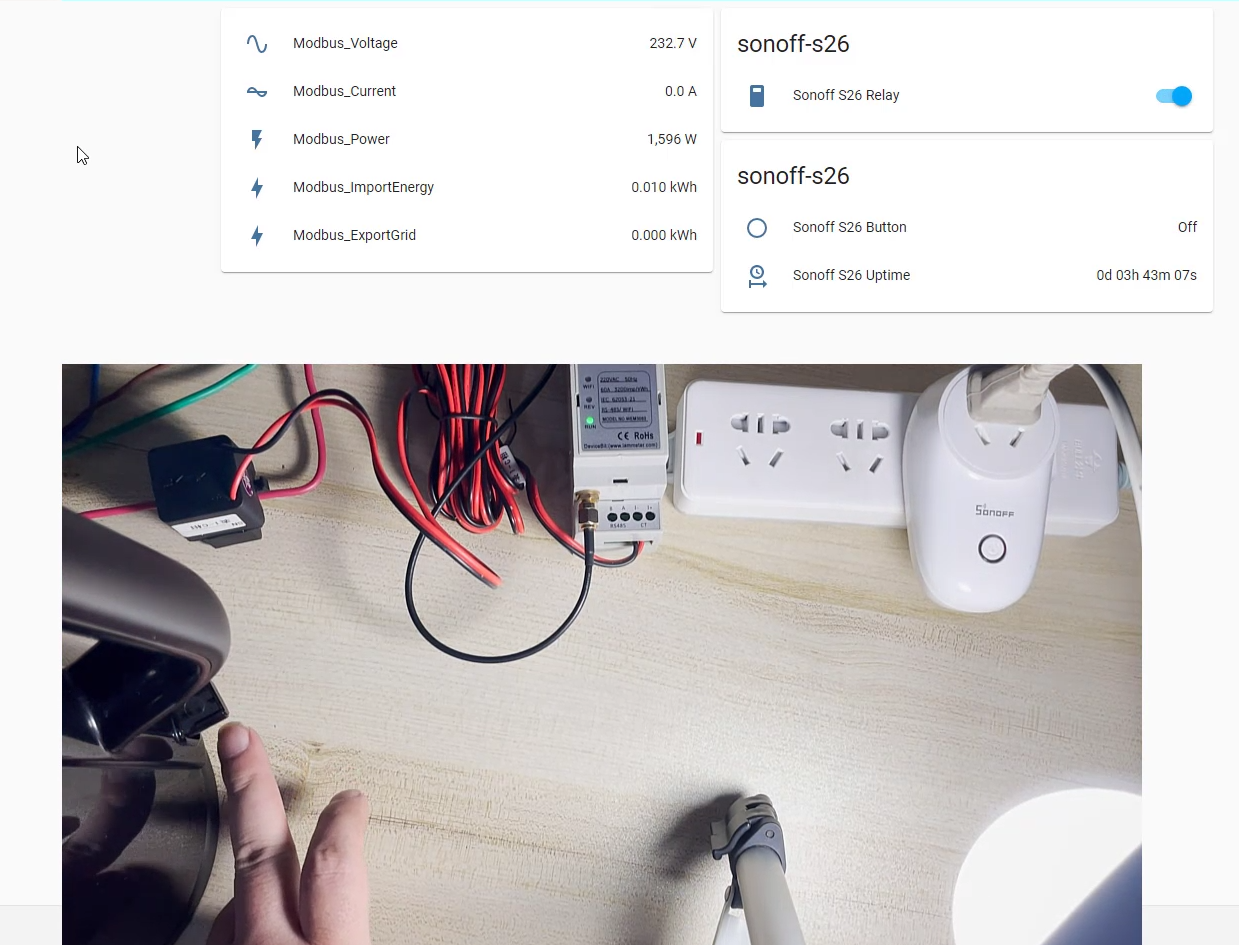
open the electric kettle, Modbus_Power=1596W > 1000W,then Sonoff S26 Relay turn on.
Ready to turn off the kettle.
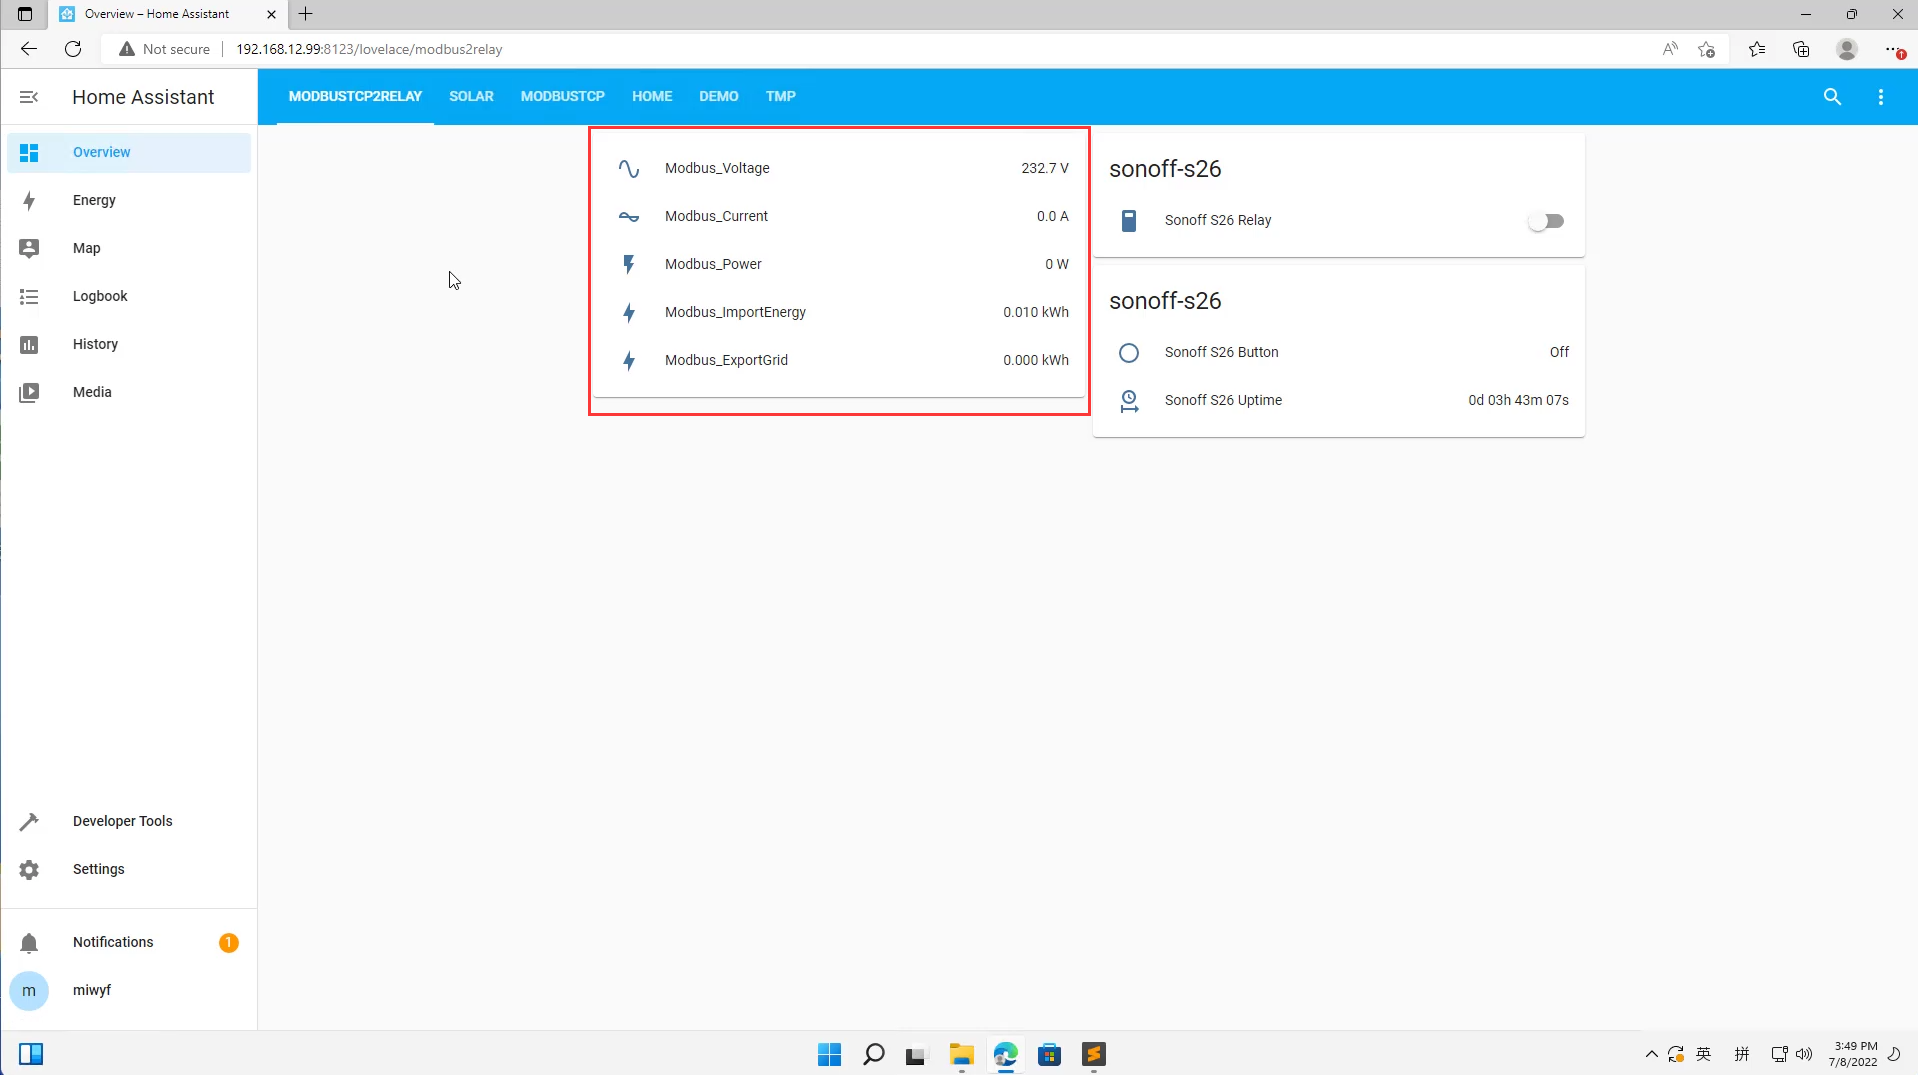
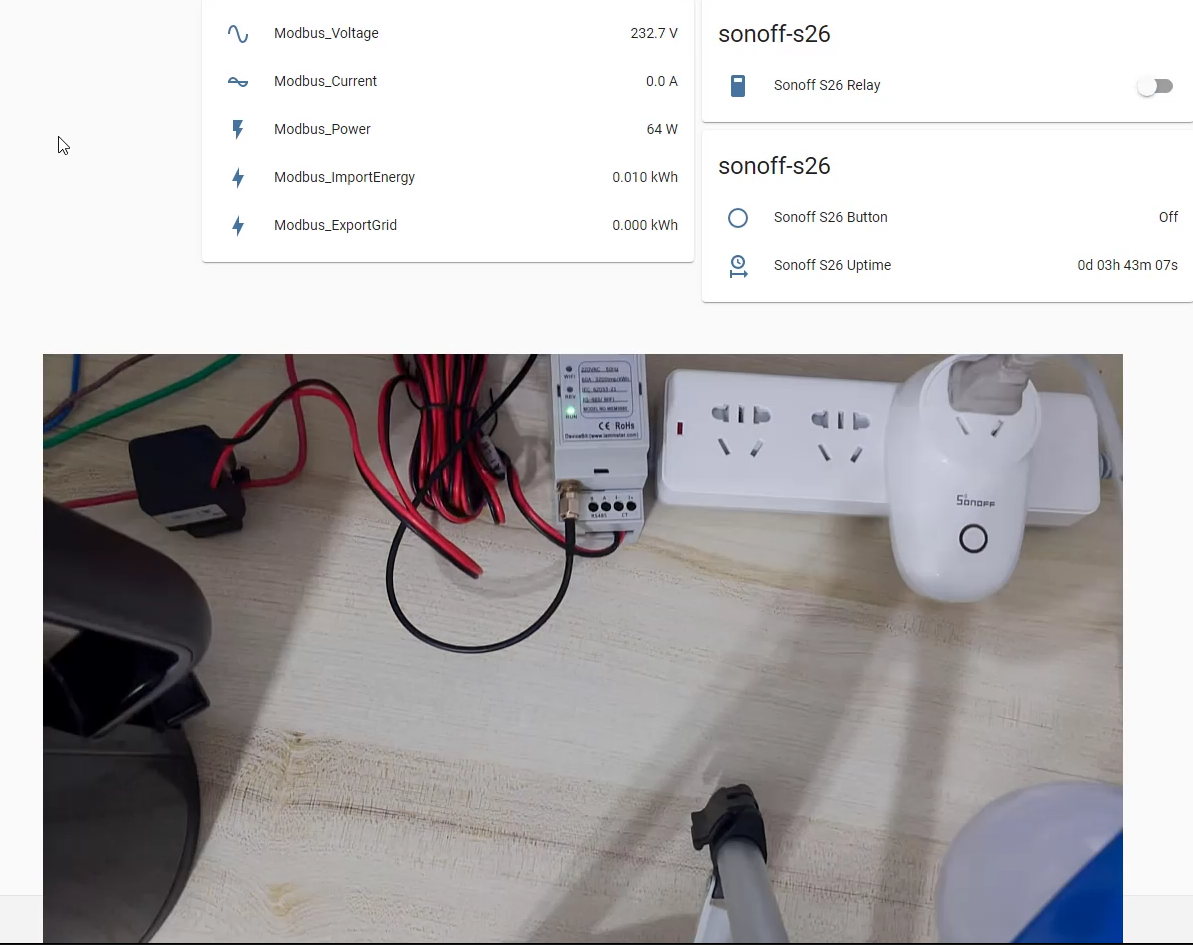
The electric kettle is off , Modbus_Power=64W < 500W,the Sonoff S26 Relay turn off.
The whole experiment effect is show in this video (the last 30 seconds of this video)
Use IAMMETER`s product in the Home assistant
- Four methods available for integrating IAMMETER's energy meter into Home Assistant
- Summary: How to use IAMMETER`s energy meter in Home assistant
- Integrate the IAMMETER Wi-Fi energy meter(single phase and three-phase) into home assistant
- IAMMETER energy meter support Modbus TCP
System && Products && Solutions
Four ways to integrate the Electricity Usage Monitor (IAMMETER) into the home assistant
Monitor your solar PV system in Home Assistant
Control the EV charging power with regard to the solar PV output and grid power reading


")
")